

Assignments
Submitting Work in CTLS
There are several ways to complete and submit assignments in CTLS. Depending on the assignment directions, you may need to upload a file, take a screenshot, type directly into the text editor, record a response, annotate a document, or use the drawing tool. CVA Teachers will not accept work via email or shared links to OneDrive, Google Drive, etc.
Overview
Choose the Submission Option That Matches Your Assignment
Before you submit, always read the assignment directions carefully. Your teacher may ask for a specific type of response, file, image, recording, or annotation. Click a card below to learn more about each option.
Add Attachments Click to learn more
Upload a file from your device, such as a document, slideshow, image, or completed assignment.
Screenshots Click to learn more
Capture your work or results on your screen, save the image, and submit it as part of your assignment.
Text Editor Click to learn more
Type your response directly into CTLS when your teacher wants a written answer submitted in the assignment box.
Recordings Click to learn more
Create an audio or video recording when your assignment asks you to explain, present, read aloud, or respond verbally.
Quick Reference Guide
How Do I Submit My Work?
Use the sections below to learn more about each submission option. You can also search to quickly jump to what you need. TIP: Clear the search bar to search again or to view all sections.
Search keywords
+ Add Attachments
Assignments
Add Attachment
Use these steps to attach a file to an assignment in CTLS and submit your work to your teacher.
Overview
Submit Your Work Through My Attachments
When an assignment requires a file, you will add the file to the My Attachments area, upload the draft, save your changes, and submit the assignment to your teacher.
![]()
Steps
How to Add an Attachment
Follow the steps below to attach a file and submit your assignment.
1 Step 1 Open Your AssignmentLocate and open your assignment in My Coursework inside your Digital Classroom. | 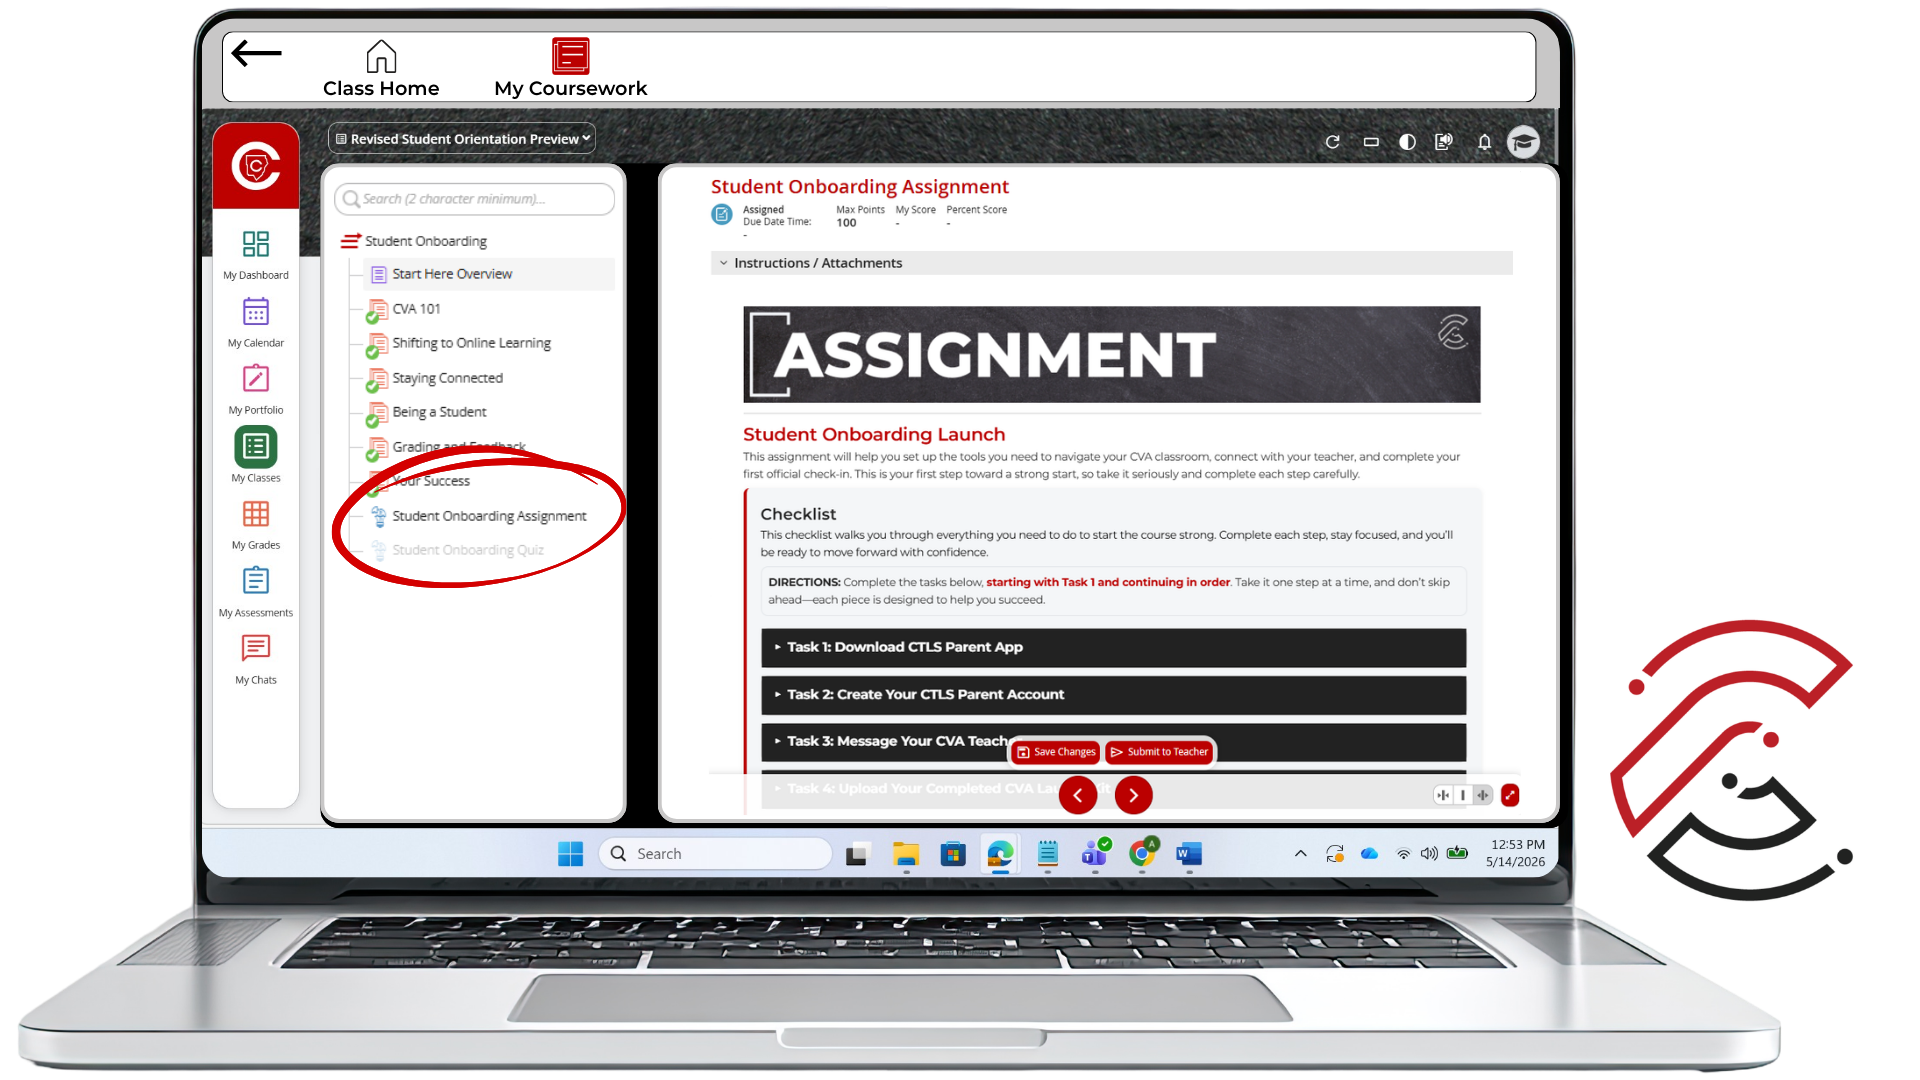 |
2 Step 2 Add AttachmentScroll down to the bottom of the page until you see the My Attachments area. Click the Add Attachment button. | 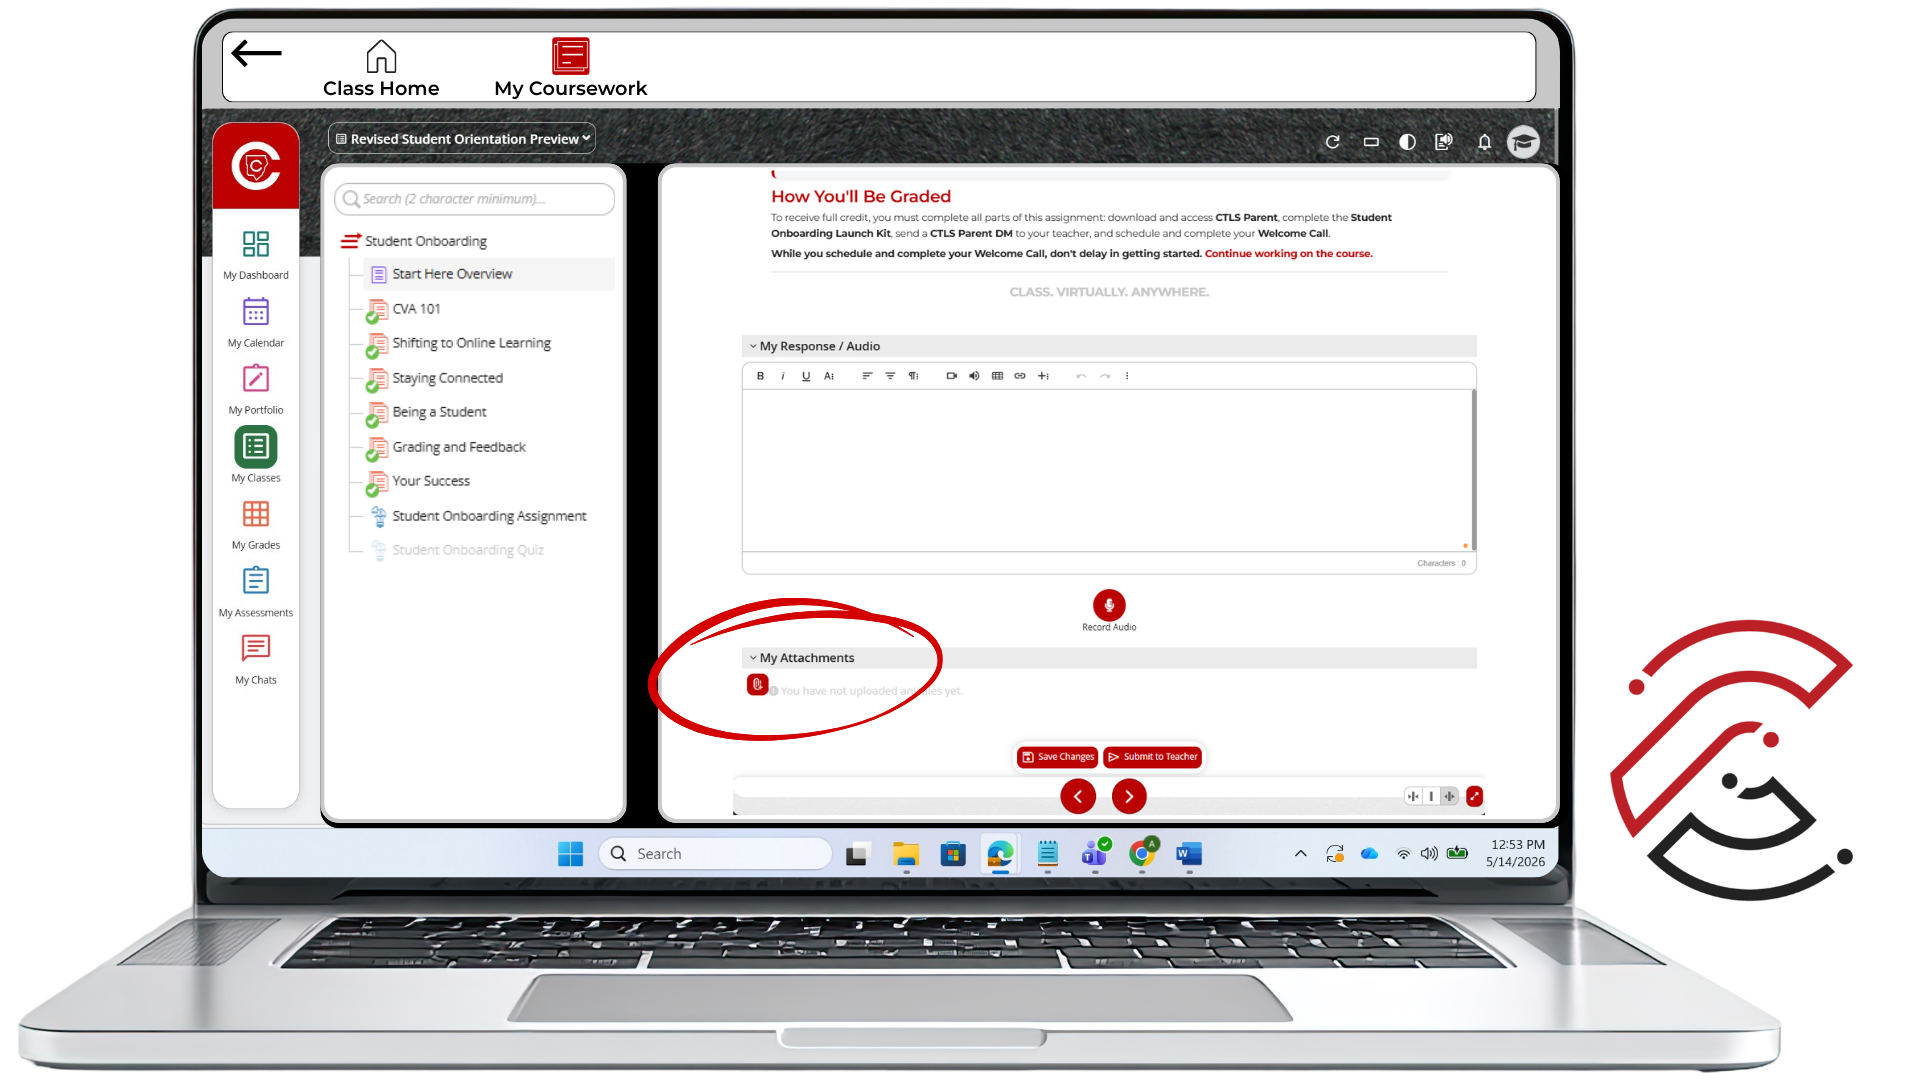 |
3 Step 3 Upload FileClick the icon to navigate to the file you want to submit. The title will auto fill with the name of the document, but you may change it. Click Save and Upload Draft. | 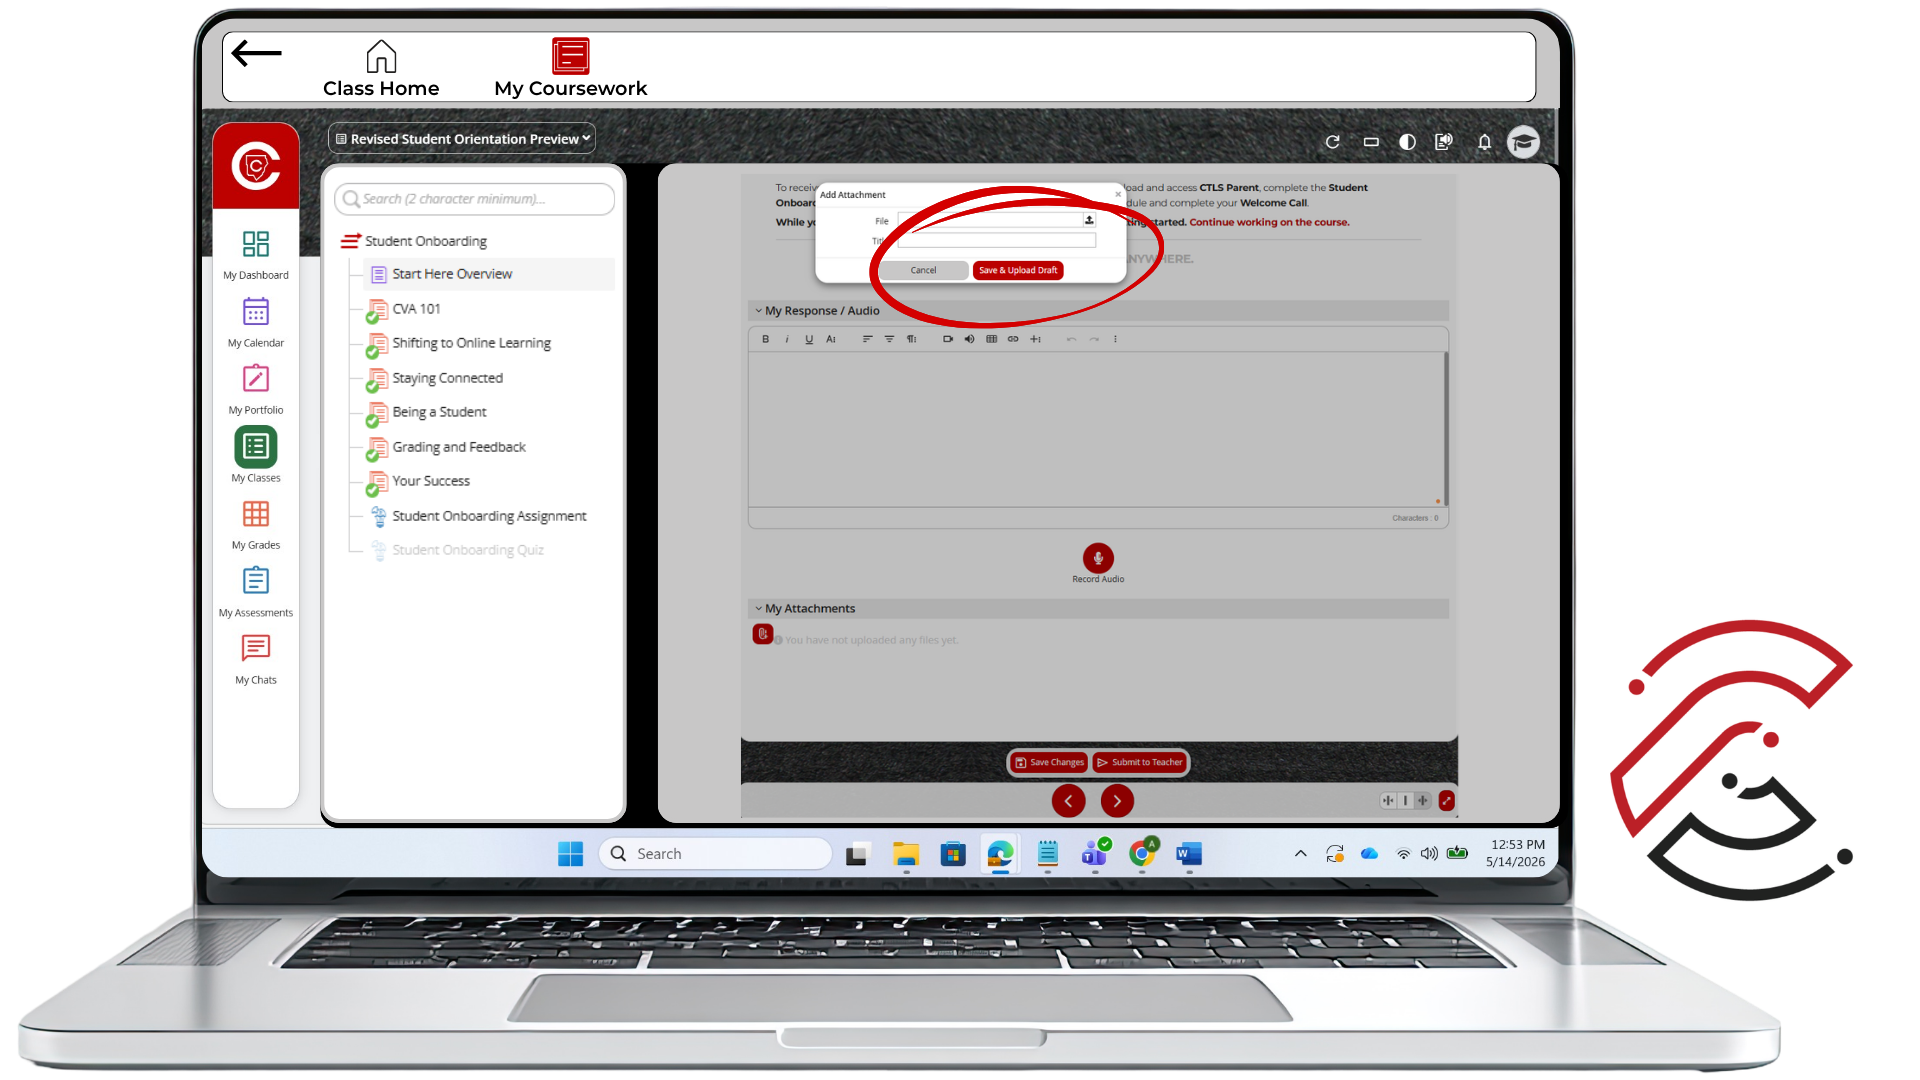 |
4 Step 4 Save and Submit Your AssignmentClick the red Save Changes icon. Then click the red Submit to Teacher icon. Finally, click Submit in the pop-up window. | 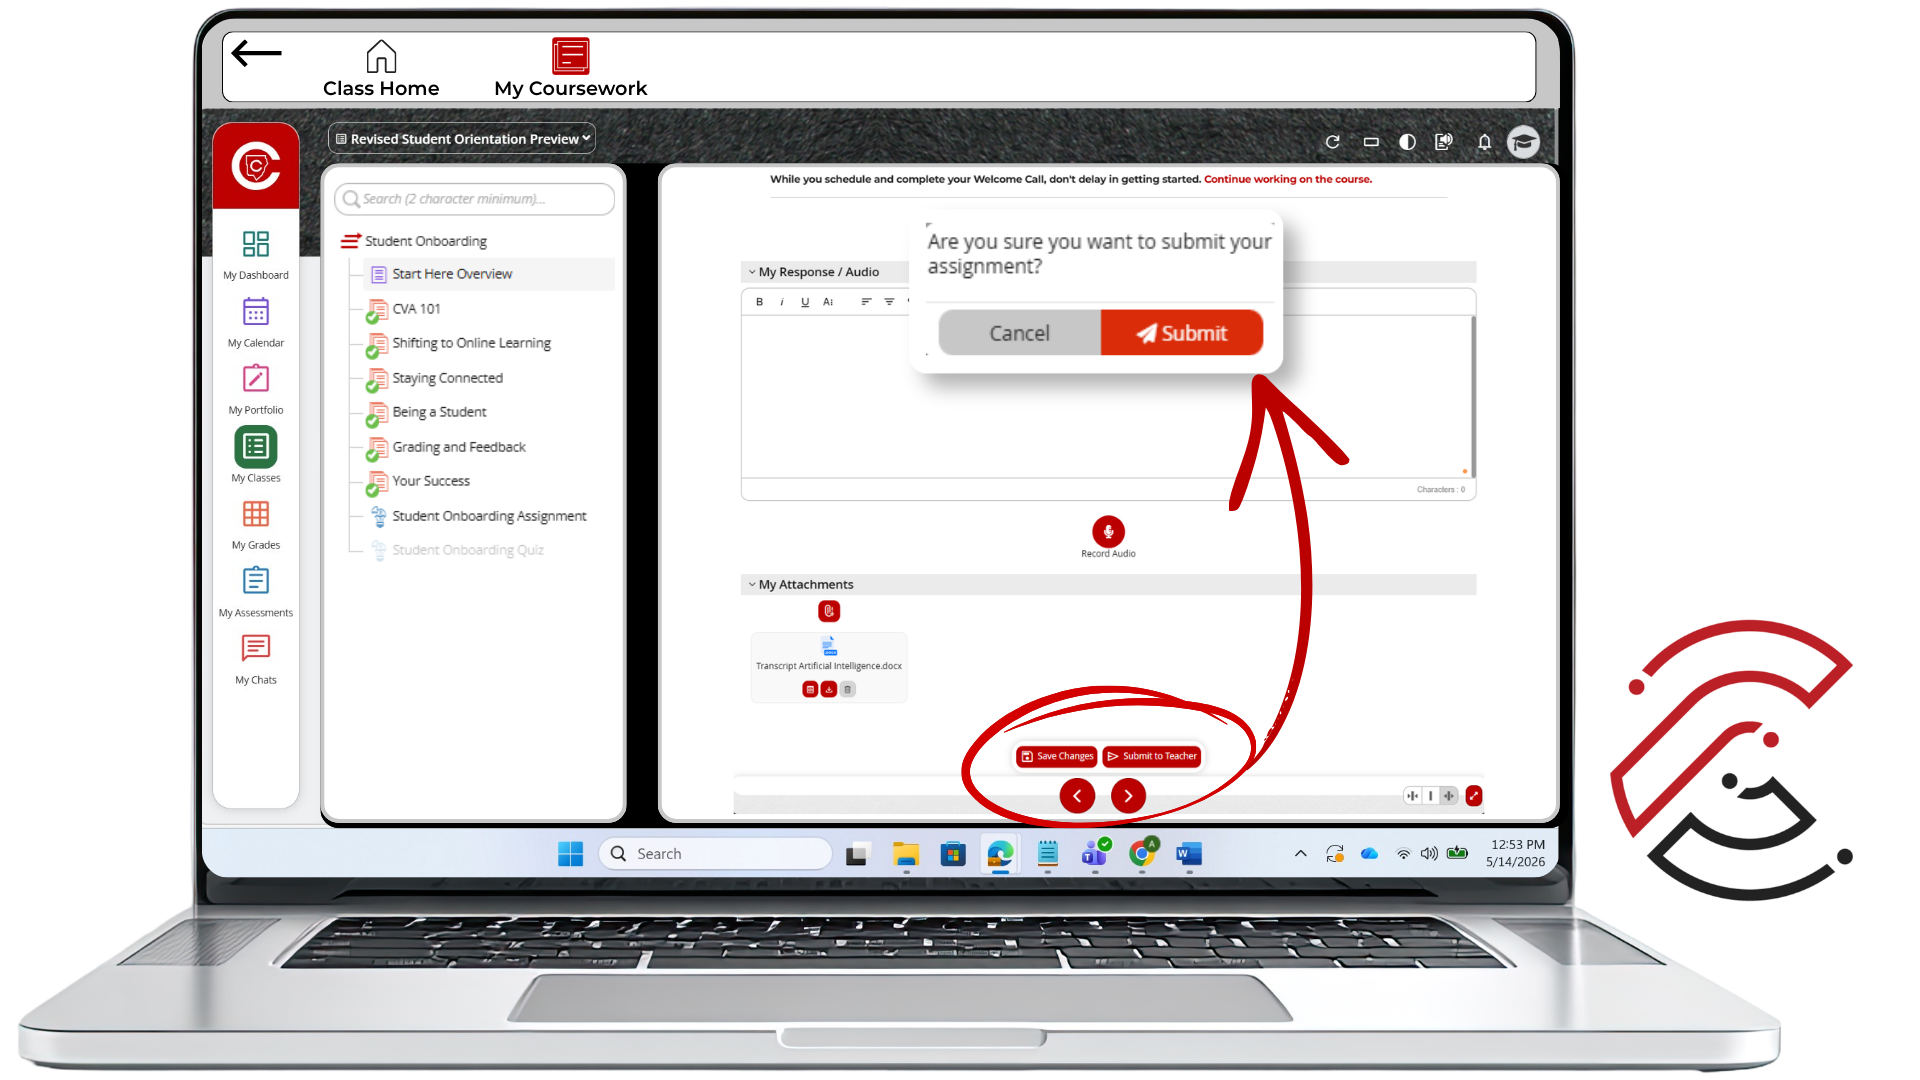 |
Important Reminder
Do Not Stop After Uploading the File
Uploading a file is not the same as submitting the assignment. After adding your attachment, make sure you save your changes and submit the assignment to your teacher.
+ Take a Screenshot and Submit It
Assignments
Take a Screenshot and Submit It
Sometimes your teacher may ask you to take a screenshot and submit it as an attachment. Use the steps below to capture your screen, save the image, and upload it to your assignment in CTLS.
Overview
What You Will Do
You will take a screenshot, save the image file, add it to your assignment, and submit it to your teacher.
Step One
Take a Screenshot
Choose the directions below for the type of device you are using.
PC / Windows How to Take a Screenshot on a PC
| Mac How to Take a Screenshot on a Mac
|
Step Two
Submit the Screenshot in CTLS
After you save your screenshot, attach it to your assignment and submit it to your teacher.
1Submit Step 1 Open Your AssignmentLocate and open your assignment in My Coursework inside your Digital Classroom. | |
2Submit Step 2 Find My AttachmentsScroll down to the bottom of the assignment page until you see the My Attachments area. | |
3Submit Step 3 Save and Upload DraftClick Save and Upload Draft after selecting your screenshot file. | |
4Submit Step 4 Save Changes and Submit to TeacherClick Save Changes. Then click Submit to Teacher. Finally, click Submit in the pop-up window. | |
Important Reminder
Do Not Stop After Uploading the Screenshot
Uploading the screenshot is not the same as submitting the assignment. After adding your screenshot, make sure you save your changes and submit the assignment to your teacher.
+ Use the Text Editor
Assignments
Text Editor
The text editor is where you type, format, organize, and add rich content to your responses in CTLS.
Overview
Use the Text Editor to Create Your Response
The text editor gives you tools to add text, format your writing, organize your response, and include rich content when needed. Click any feature below to learn more.
 Insert ImageClick to learn more
Add an image from your device directly into your response to support or illustrate your answer.
 Upload FileClick to learn more
Attach a file — such as a document or PDF — directly inside the text editor as part of your written response.
 Horizontal LineClick to learn more
Add a visual dividing line to separate sections of your response and make it easier to read.
 VideoClick to learn more
Record a video using your camera and embed it directly into your response without leaving the assignment.
 Take a PictureClick to learn more
Use your device's camera to take a photo and insert it into your response on the spot.
 AudioClick to learn more
Record your voice and embed the audio clip into your response — useful for reading aloud or verbal explanations.
 EmoticonsClick to learn more
Insert emoji-style emoticons into your response to add expression or visual variety where appropriate.
 CharactersClick to learn more
Insert symbols and characters not found on a standard keyboard, such as accented letters or currency signs.
 Embed a URLClick to learn more
Add a clickable hyperlink to a website or resource directly within your written response.
 Math TypeClick to learn more
Use a built-in equation editor to write and format math expressions, fractions, exponents, and other mathematical notation.
 Chem TypeClick to learn more
Use a chemistry-specific editor to write chemical formulas, equations, and notation accurately in your response.
Steps
How to Use the Text Editor
Follow the steps below to type, format, organize, and add content to your response.
1Step 1 Access the Text EditorYou have access to the text editor in several places: Assignments, Discussion Posts, some Assessment items, and My Calendar. | 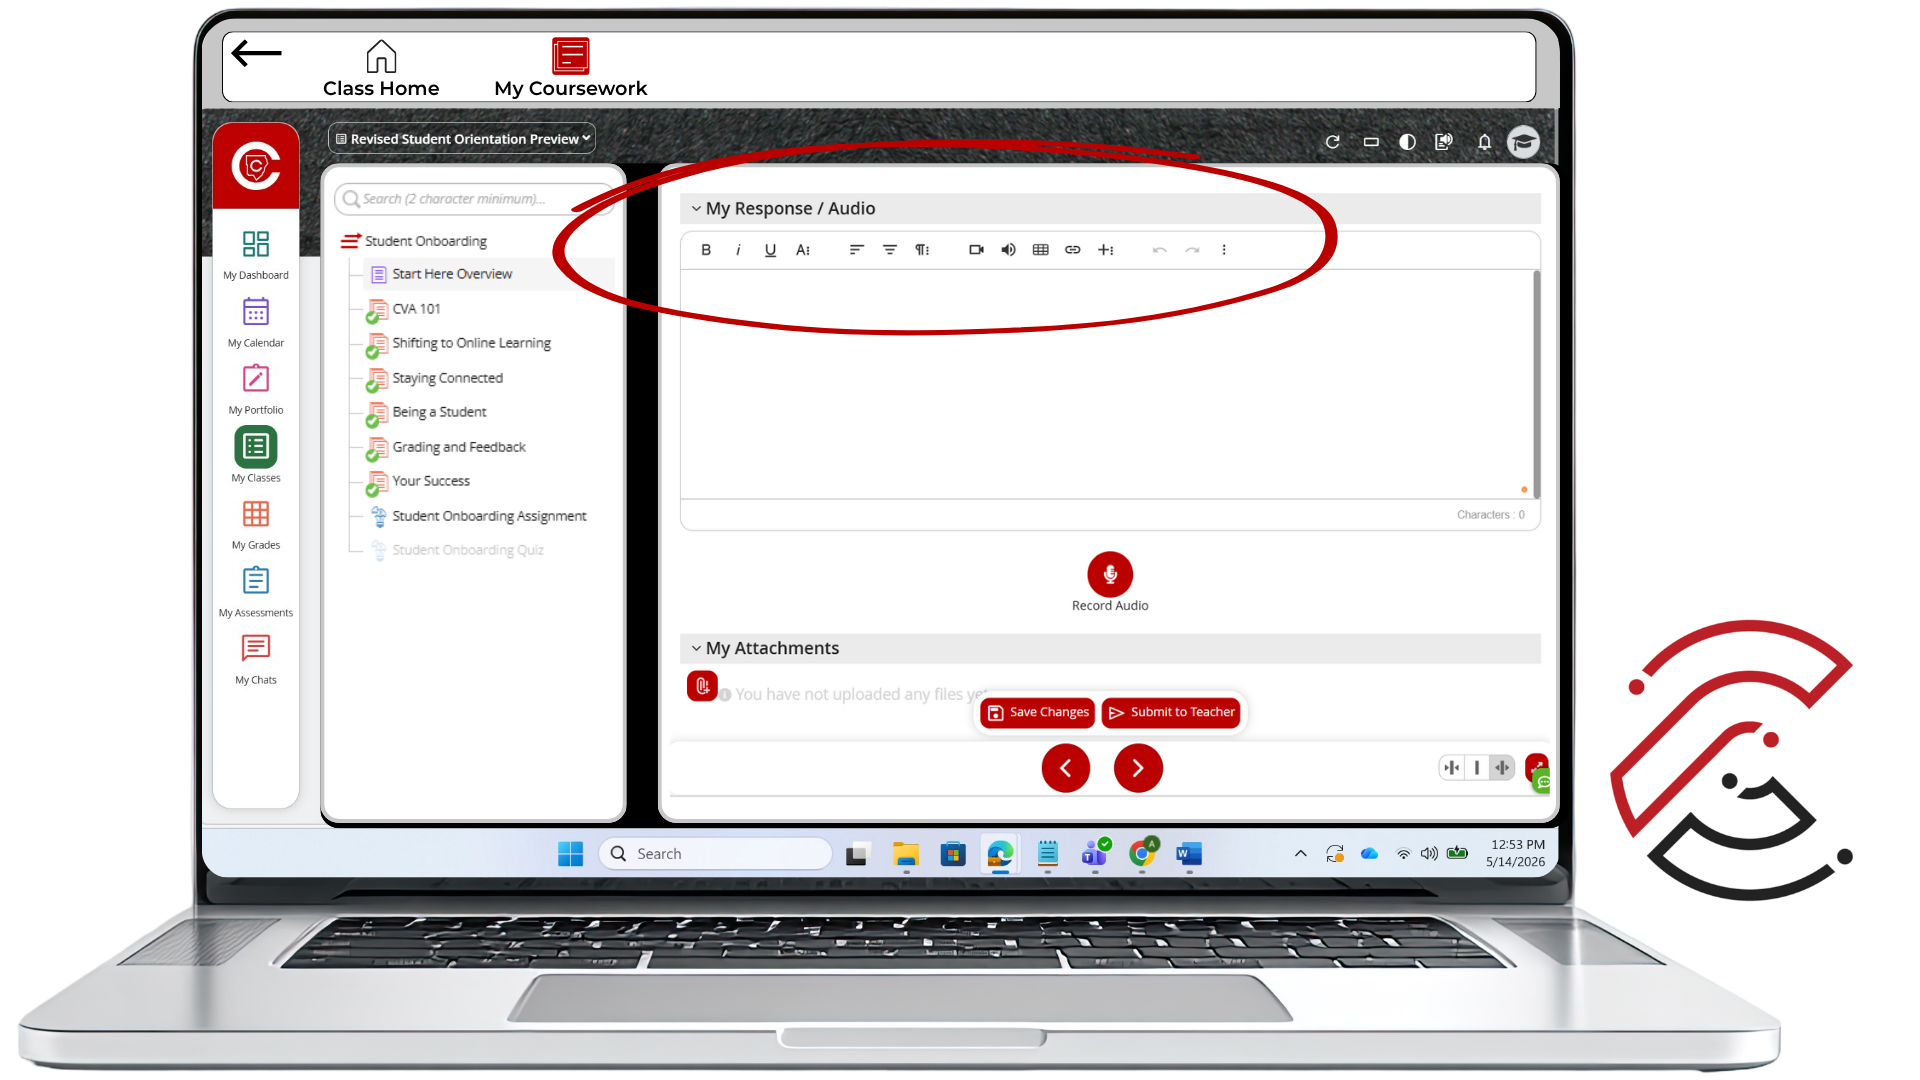 |
2Step 2 Add TextUse the text box to type your response. You can customize the text color, font, size, bold, underline, etc. by clicking the More Text icon. Note: Use these to emphasize important parts of your responses. | 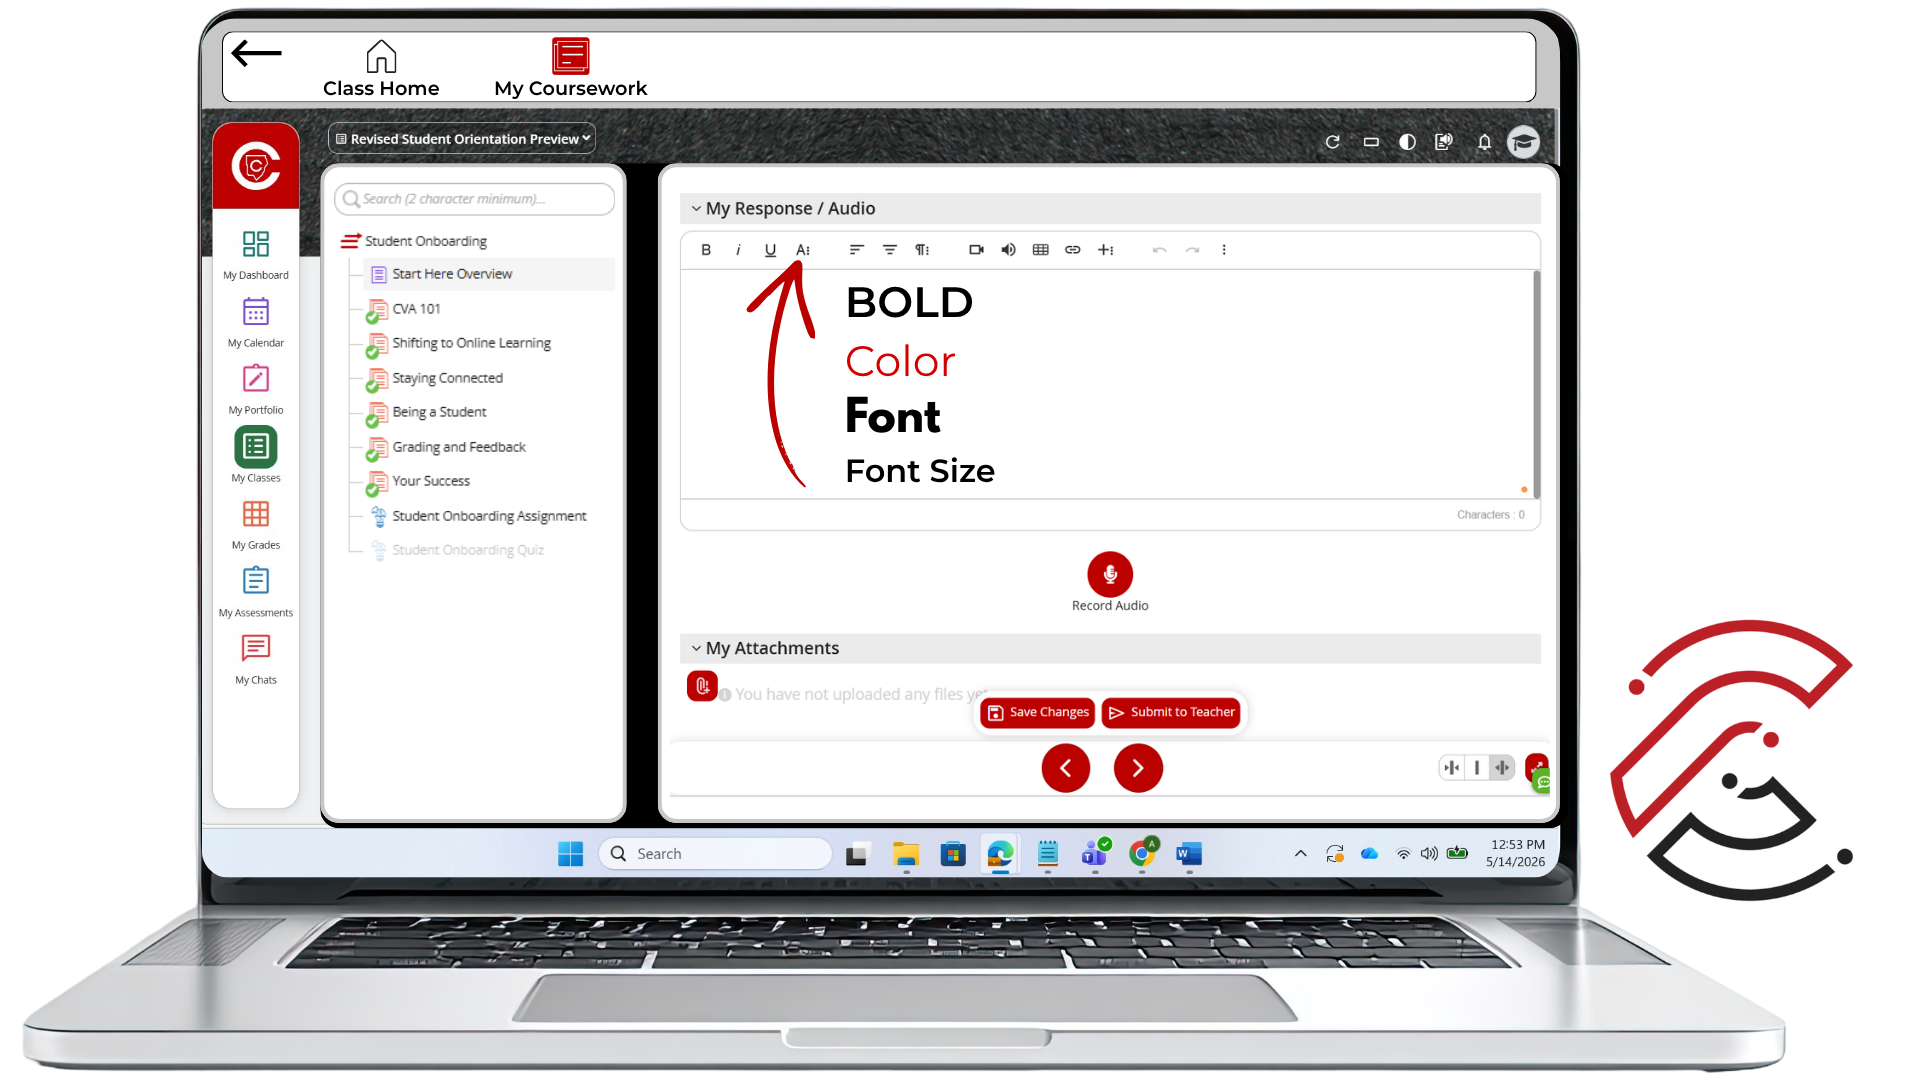 |
3Step 3 Organize Your ResponseUse the More Paragraph icon to organize your response using numbered lists, bulleted lists, alignment options, and other special features. | 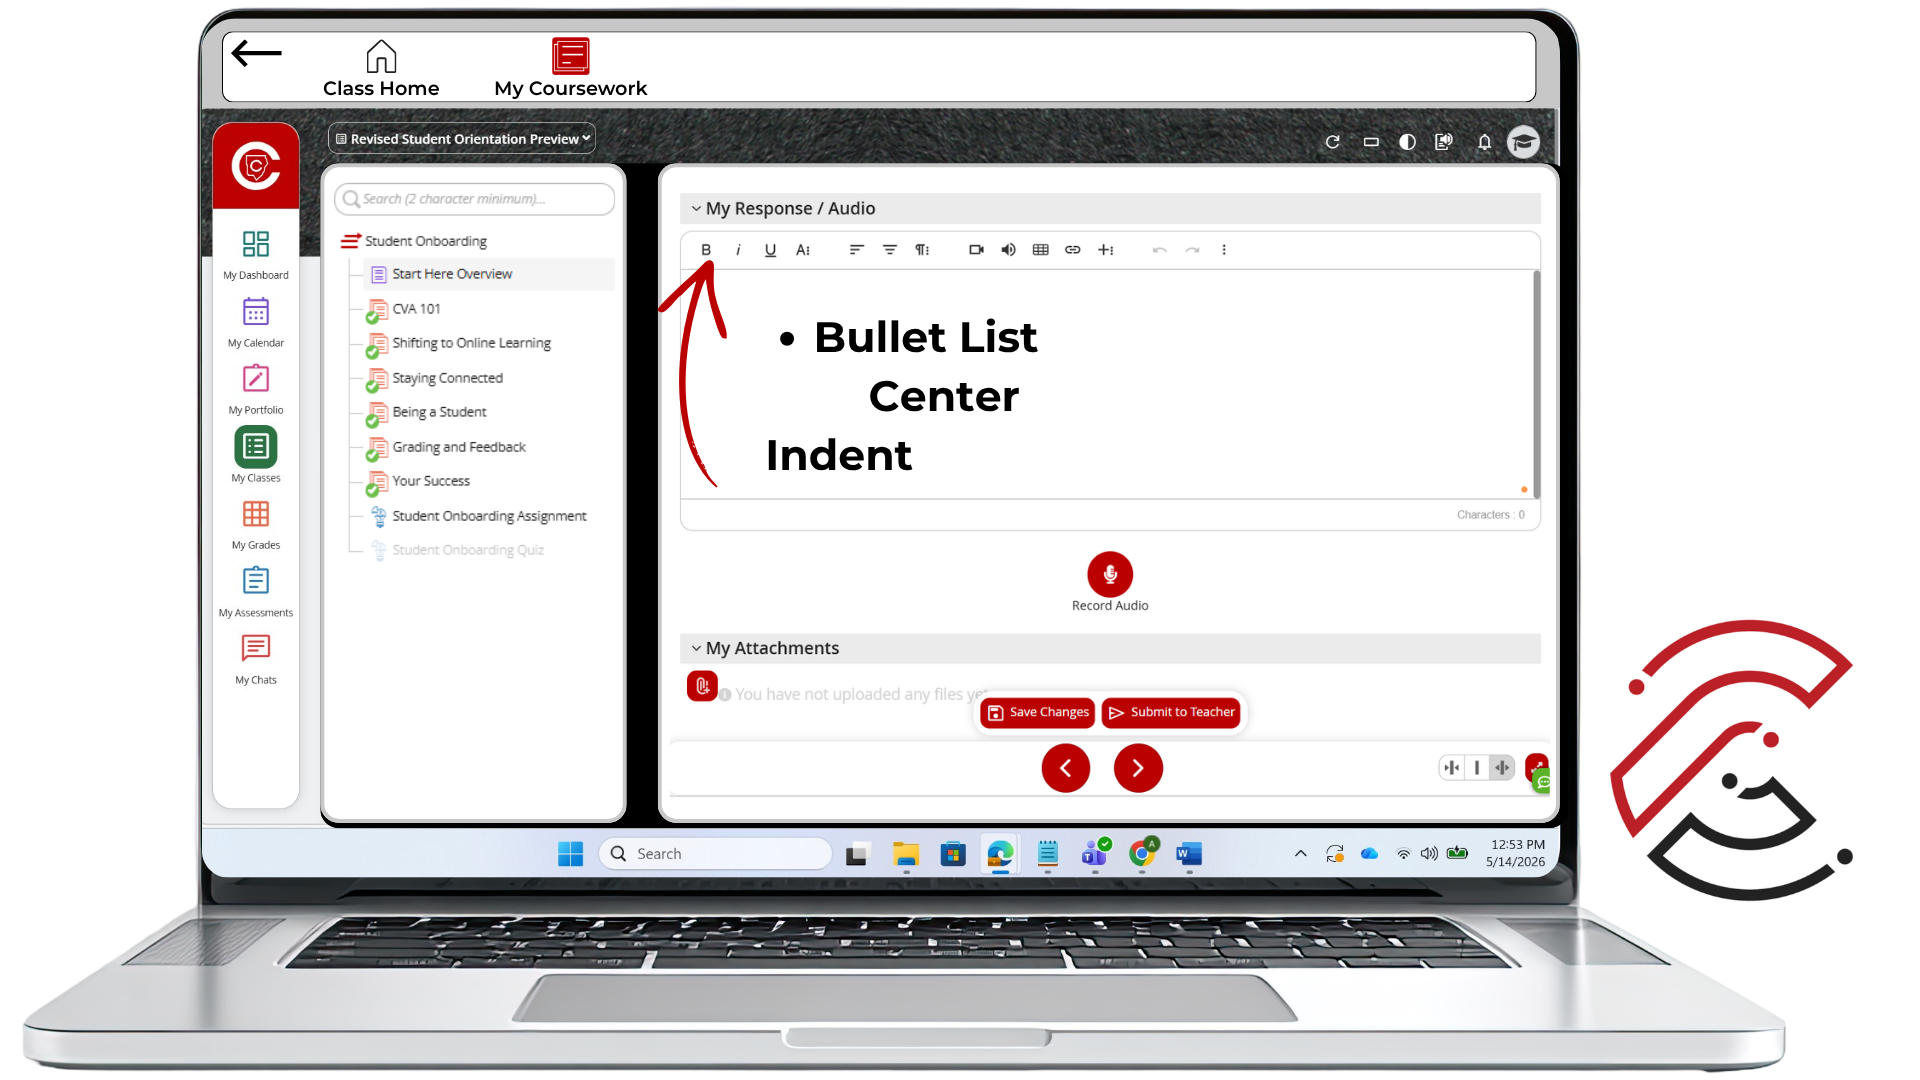 |
4Step 4 Use the More Rich OptionsUse the More Rich icon to add additional features to your response. |
Important Reminder
Use Formatting to Help Your Reader
Formatting tools can help you emphasize important parts of your response, but your writing should still be clear, focused, and easy to read.
+ Record a Response
CTLS Assignments
Recordings
Some assignments may ask you to record audio, record video, take a picture, or explain your work. Use the steps below to add a recording and submit your assignment in CTLS.
Overview
Add a Recording to Your Assignment
In CTLS, you can add a video recording, audio recording, screen recording, picture, or audio explanation when your assignment requires it.
Video Recording | Audio Recording |
Steps
How to Add a Recording
Follow the steps below to add a recording to your assignment and submit your work.
1Step 1 Open Your AssignmentLocate and open your assignment in My Coursework inside your Digital Classroom. | |
2Step 2 Choose Recording TypeClick the More Rich icon. Choose the Video Recording or Audio Recording icon. You can also scroll down and click the red Record Audio icon to add audio quickly. | 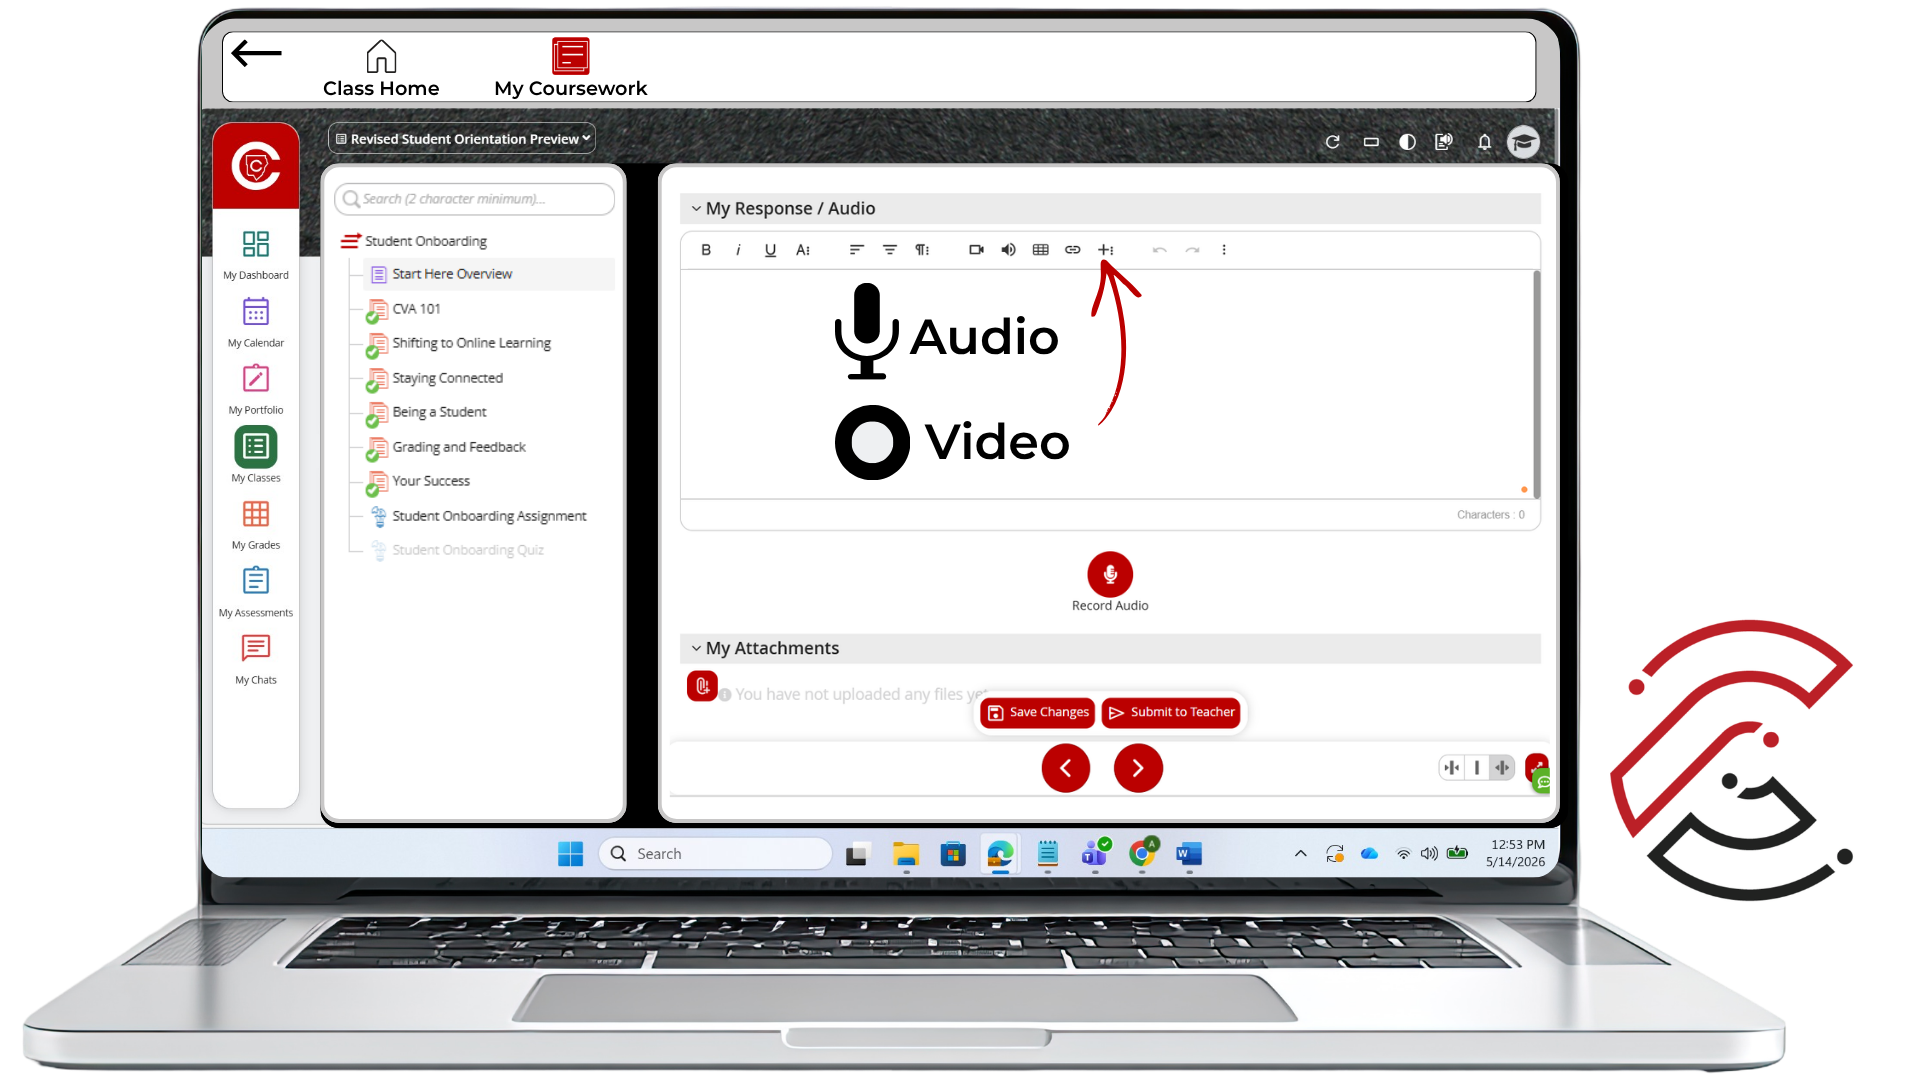 |
3Step 3 Allow AccessAllow camera and microphone access. Then, click OK from the Video Preview Screen. The recording will start automatically. | 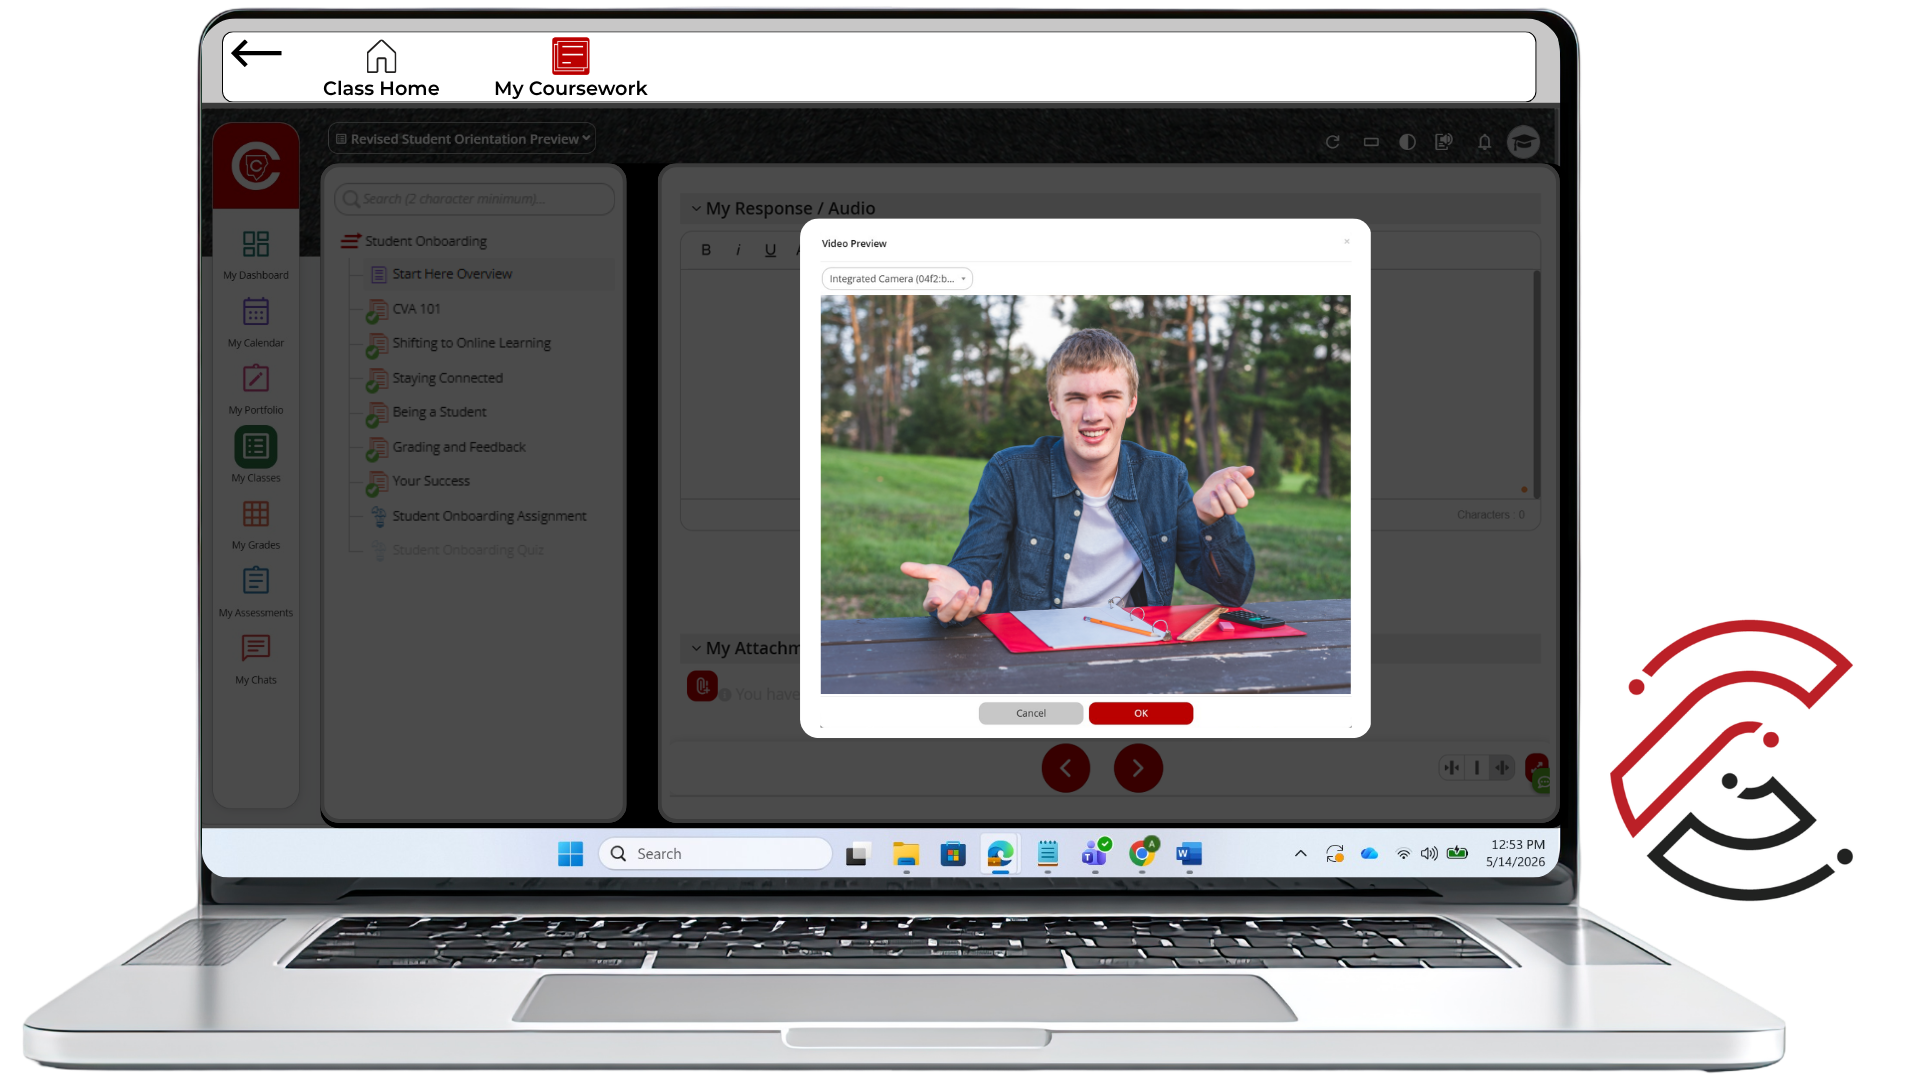 |
4Step 4 Record VideoChoose Screen On to screen record, or select Take a Picture. You can Pause Recording. Click Stop Recording when done. Wait for the video to save. Click the red Save button when done recording audio. | 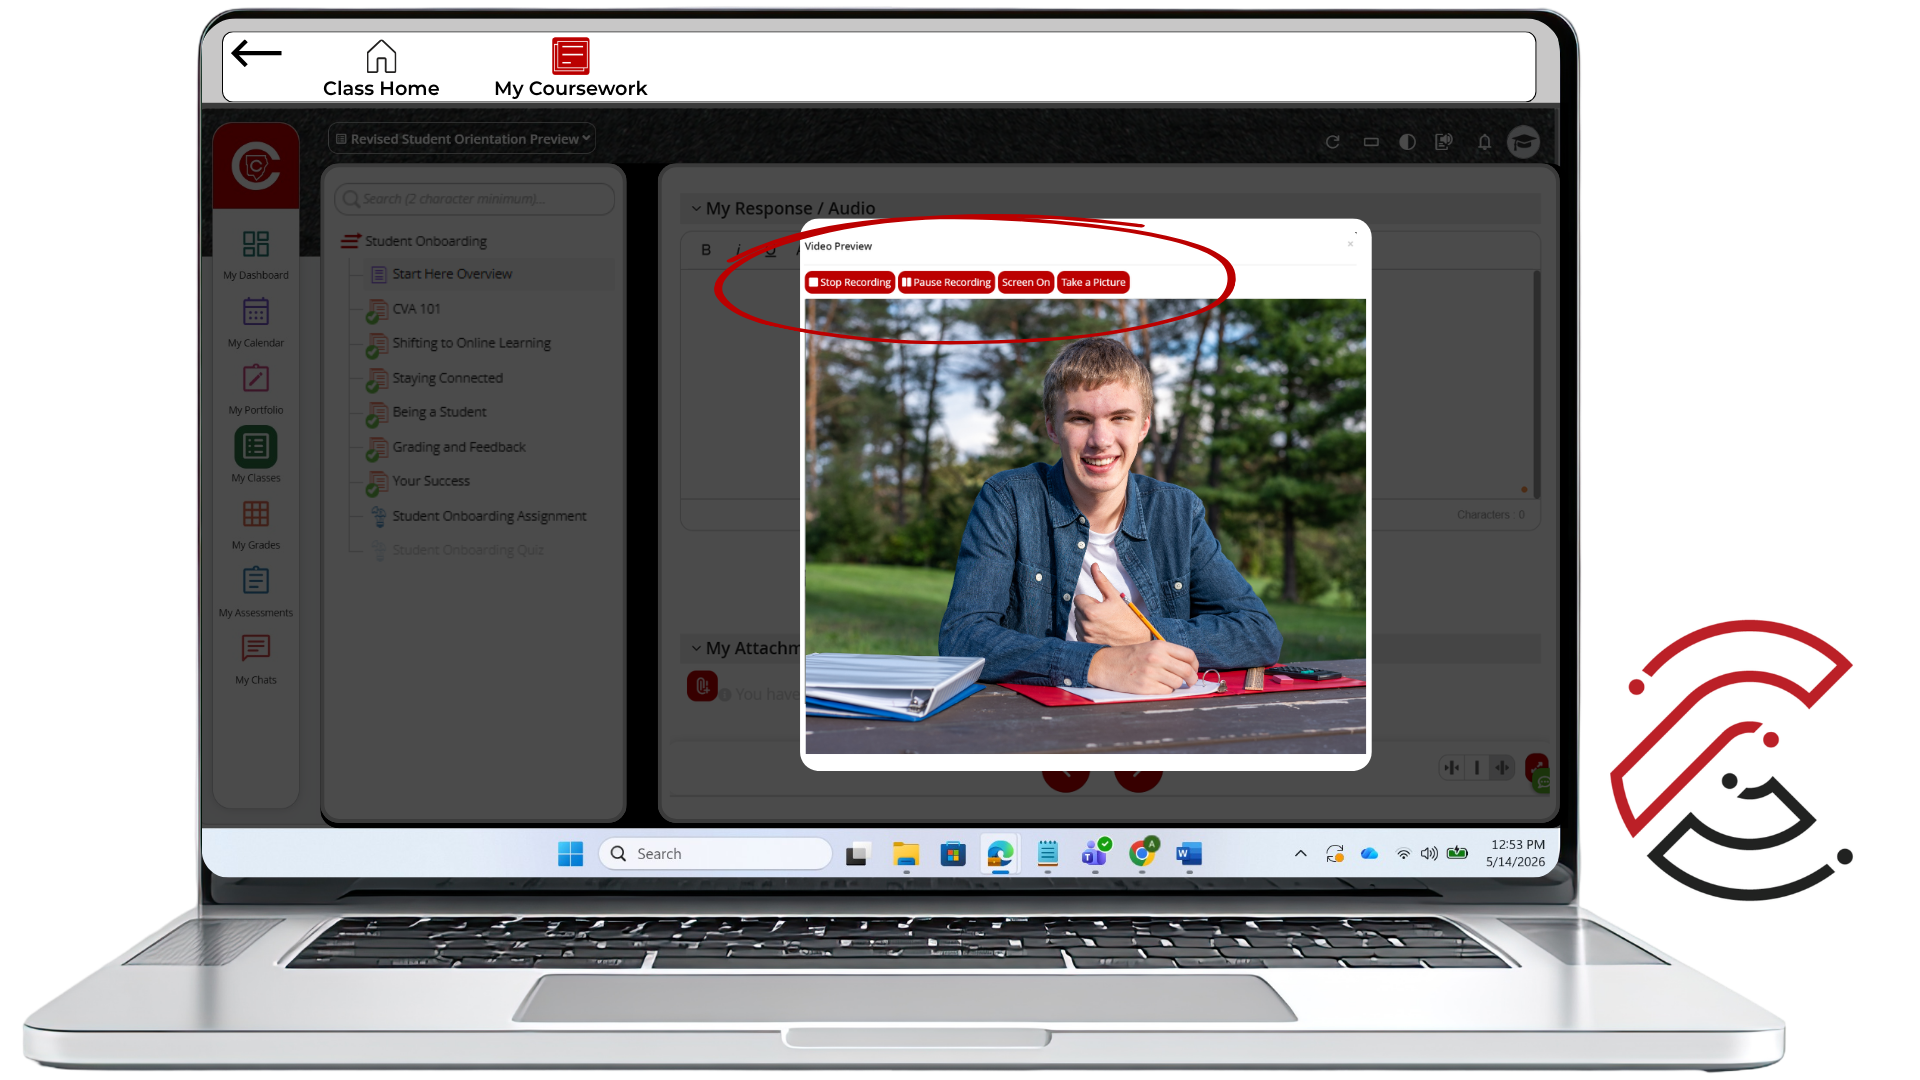 |
5Step 5 Save and Submit Your AssignmentClick the Save Changes icon. Then click the Submit to Teacher icon. Finally, click Submit in the pop-up window. | 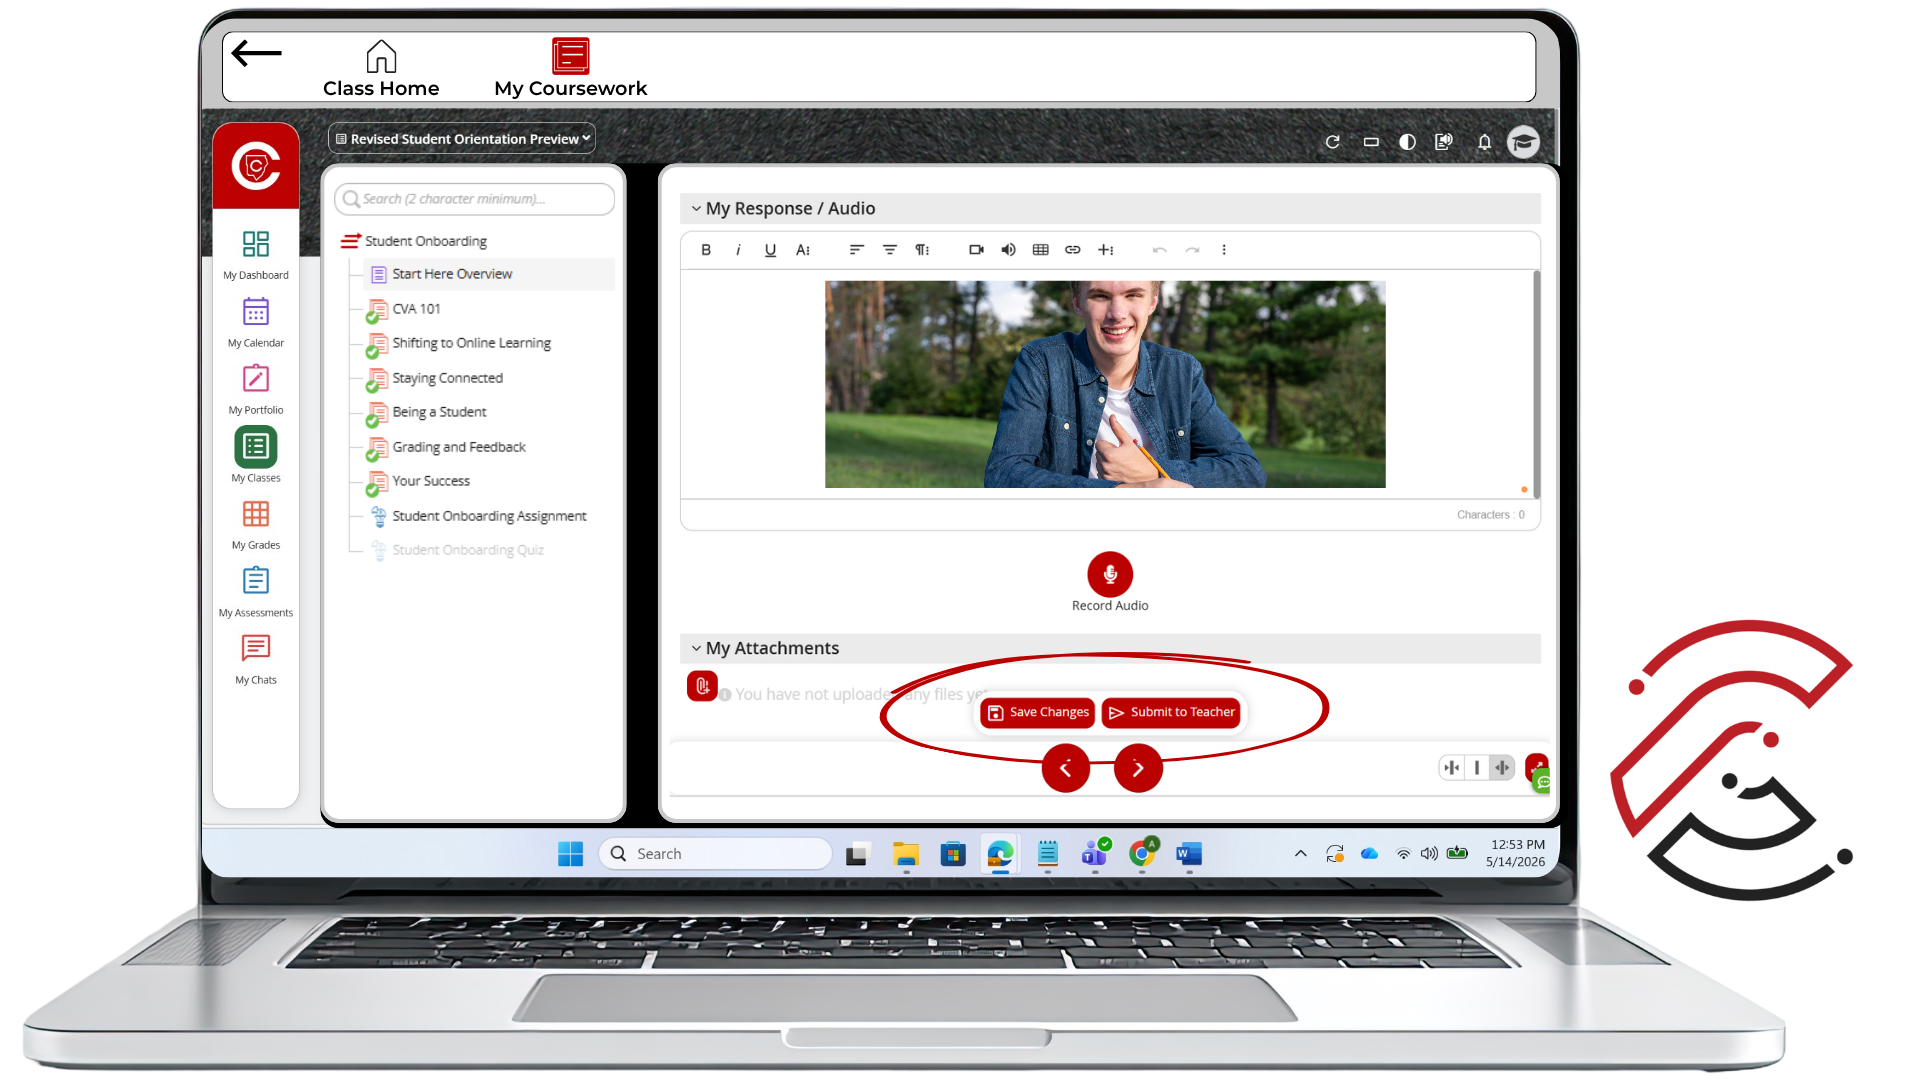 |
Important Reminder
Do Not Stop After Recording
Recording your audio or video is not the same as submitting the assignment. After adding your recording, make sure you save your changes and submit the assignment to your teacher.
Important Reminder
Read the Assignment Directions First
Your teacher may require a specific submission type. Make sure your work is attached, saved, and submitted before leaving the assignment page. Teachers will never accept work via email or shared links to OneDrive, Google Drive, etc.
Class. Virtually. Anywhere.